The idea
I have always wanted to take my computer with me where ever I went, on vacation, to SIGGRAPH, anywhere. But 4200 rpm drives, price, and proprietary hardware kept me at a distance. I worked as a PC technician for some time and I really enjoy building PCs from parts, as it's cheaper and easier to deal with a manufacturer to replace a part when it breaks, than deal with a computer vendor. For the price of a decent laptop, I could build 2 dual processor machines, it just wasn't worth it to me. For a while I had looked at metal suitcases, envisioning a desktop machine laid out inside, and the rise of the Mini ITX form factor only solidified my lust for a powerful desktop I could take with me.
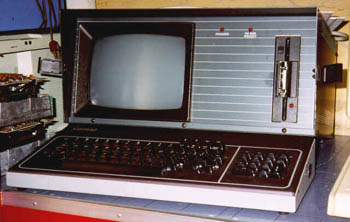
 This is a picture of my mother taken in 1982. As an accomplished writer, her work shouldered the cost of a "personal computer" for her to use to work from home, this was such a big deal that many local newspapers ran the story. I grew up looking at this thing in the garage, the attic; always wondering what it was. On days when I tired of the commodore 64 or Apple //e I would go and fire it up, trying to navigate around and figure it out. I later bought one for myself for 5 dollars at a yard sale, It was kind of a waste, as it didn't even run, but it had the HD upgrade, and just taking it apart to see that huge Western Digital drive was fun enough. Here is a picture of what a Kaypro computer looked like up close. The keyboard folds up to become the bottom of the briefcase, which weighs a TON.
It was a while later that I decided to build some kind of Desktop that I could take with me. I hadn't even thought of the Kaypro. I jotted down some of the things I would want in a portable computer:
- A fast HD. 10K rpm, perhaps a RAID. This meant SCSI, and heat.
- A fast processor, preferably two. I was on a budget so I was shooting for AMD. Again, heat is an issue.
- A large backup drive. 200GB IDE or the like.
- The case must be under standard aircraft carry-on size. This was one of the most important issues.
- A decent full spec OGL card. Preferably Nvidia Geforce 2 MX or better.
- Easy access to firewire, decent audio, USB ports.
- 10/100 NIC and dual band wireless.
- An optical drive that could Read DVDs, and read/burn CDRs.
- A decent screen 1024x768 or higher res.
- All for under $700, and perhaps a few parts I alreay had around the shop..

This is what the original machine looked like.
Here's what I scraped together:
Asus A7V8X-X - $107
- 10/100/1000 NIC
- 4 USB 2.0 ports
- 6 Channel Audio w/ S/PDIF
- 333MHz FSB
- AGP 8X
- 2 UDMA 133 IDE Channels
- 333MHz FSB
Athlon 2600 - $70
512MB DDR PC3200 - $90
420w Power Supply - $60
Dlink DWL-AG520 Tri-Mode Dualband (2.4/5GHz) Wireless PCI Adapter - $70
Western Digital 200GB 7200rpm Special Edition - Had it lying around
Atlas 10k II 10,000rpm 9GB SCSI - Ebay $20
Atlas 10k 10,000rpm 9GB SCSI - Ebay $10
Tekram SCSI 3 RAID Adapter - Ebay $110
4 Port Firewire Card - $20
15" LCD Touchscreen XGA (Dual VGA input) - Ebay $90
Enermax Front Panel (2 heat sensor display, Firewire, USB2, audio, fan control) - $20
Geforce2 MX dual head - Had it lying around
48x24x48x16x CDRW DVD - $65
Keyboard and Mouse - Had them lying around
Total: ~$735
 Being the 3D nerd that I am, and the small amount of space I had to deal with, I rudimentarily modeled the Kaypro case to scale, looking up the rough size of all the items on my tentative list. It took about 10 mins. This allowed me to move everything around and make the most of the space inside. Pictured at left is an early layout. As you can see from a view of the final layout that it was very cramped.
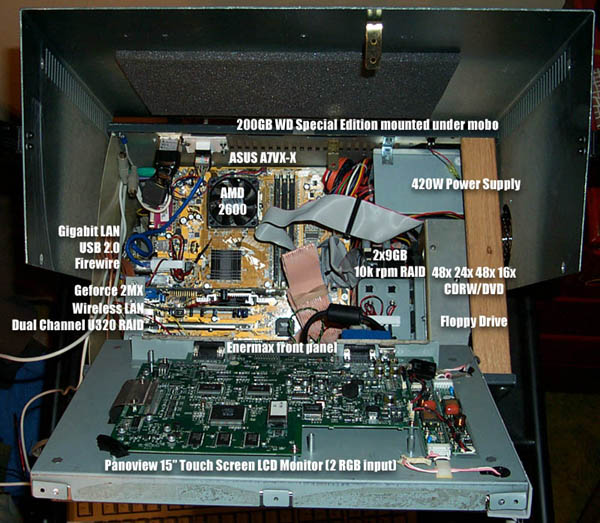
I have completed the project, unfortunately I didn't really take any pictures putting the thing together, so I now need to take it apart sometime to let you better examine the internals. Here is an image from from above showing the entire layout:

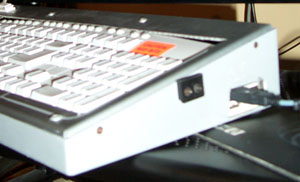
I had to replicate the mobo ports on the outside of the case. I did so by first getting a front panel that had USB2, firewire, and audio (mini). For the first time I broke open a Power Supply and wired the switch to the front under tha panel next to the ATX power. [please refer to the image below or this larger one] In the upper left you can see the plug of the power supply as well, the power supply is in the upper right. I added the fan in the front which blows directly across the 10k RAID, and there is a temp sensor mounted between the drives which feeds into the front panel. The panel adjusts the fan speed based on the temperature. (Panaflow, gotta love 'em)
I wired the ethernet to the outside with a small piece of 10bt, and a wall plate. I found the white papers for the LCD monitor (which took FOREVER), and wired its power to a molex connector (12v) to allow the power supply to power the monitor, which needed 12v luckily so I didn't have to break out the zener diodes and resistors.

Above you can see how it opens, the necessary holes have been drilled to match the fans in the closed position as well so that I can fold it up and just let it render under a desk or something. I used the same Kaypro spiral cord to attach the keyboard to the machine, and cut a hole large enough to accomodate about any keyboard. I ended up going with a 9.99 kb from Best Buy that I coaxed into working with the MS intellitype drivers.


This is what it looks like folded up with the mouse inside, 10ft. of ethernet, a mousepad, and the power cable. It has the correct venting to run closed like this. The panaflows must be cranked kinda high while rendering, but you can just toss it under a desk or in a closet. I routed USB and the keyboard though the same wires, though I was short, and ended up having them share the same ground and power. I can now string a mouse and off the keyboard, and even more devices, as it's a 4 port hub.

And last but not least,is a picture of the finished product. I find it funny how sometimes things just work. I cut the buttons right off the front of the LCD monitor and screwed them directly onto the side of the metal frame -it almost looks like they were meant to be there! One power cable [located in rear] which detaches and is stored in a compartment on the right side above the floppy drive (barely visable in front of the power supply), and one cable connecting the keyboard mouse; that's it. The mouse and mousepad fit easily in the space between the keyboard and the machine when closed, there's even room for 6ft of 10bt.
